
Being in the business as long as we have, we are constantly learning to develop some innovative ways to get the job done safely and efficiently. One thing that we are regularly reminded of is the importance of having the right tool for the job. Below, we will teach you how to customize a painter’s extension pole to become an immensely helpful tool for the installation and removal season.
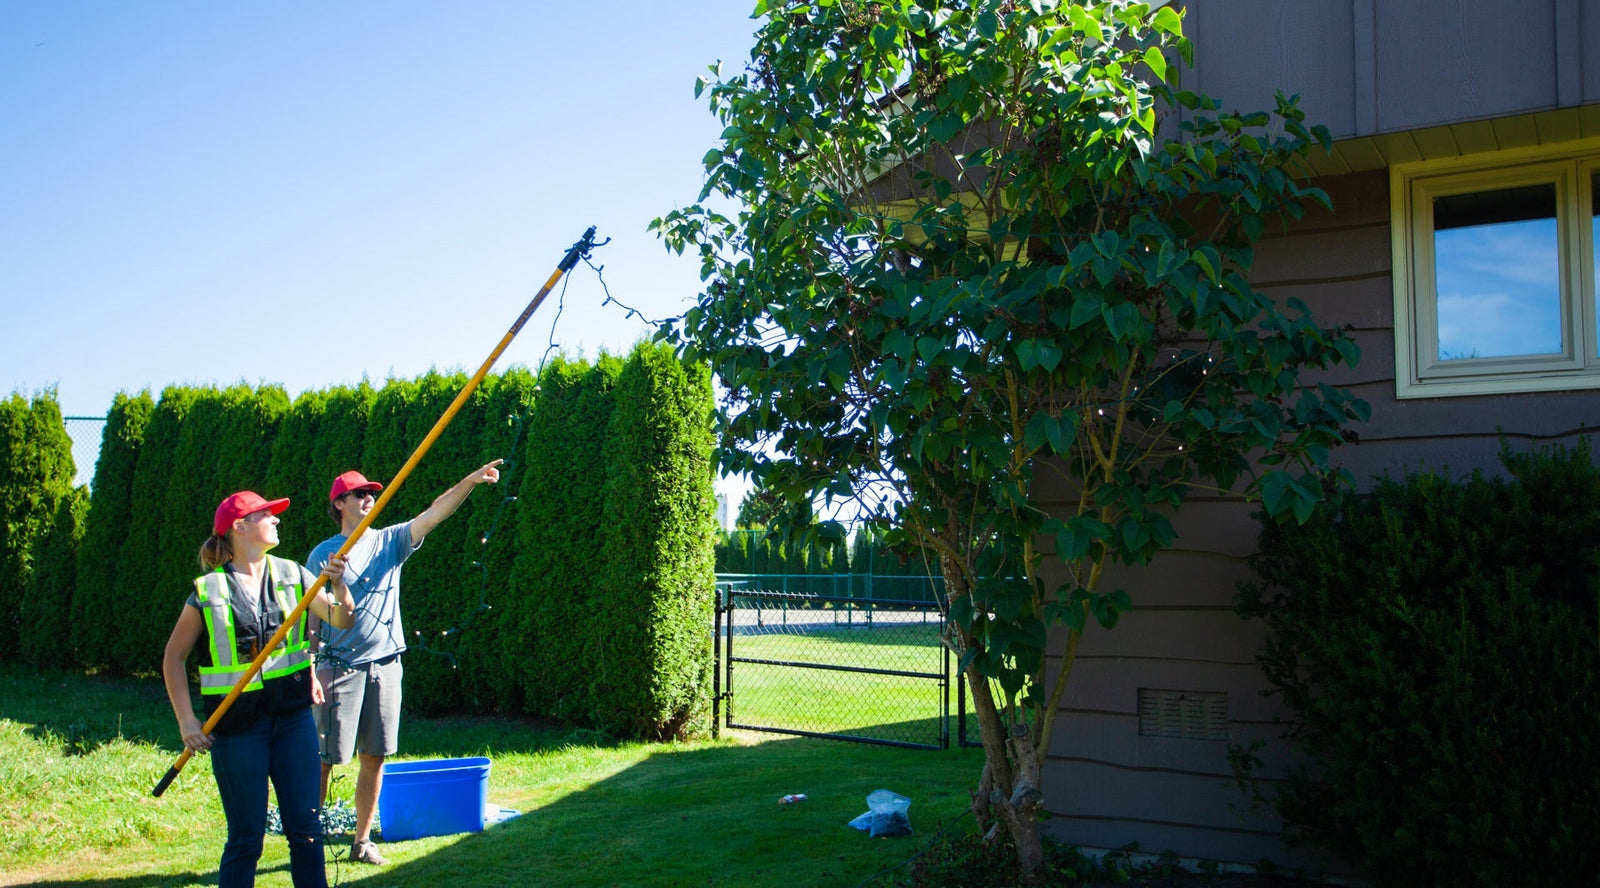
Refashioning an extension pole is a quick and easy way to solve the issue of getting lights on or off those hard to reach places that we all encounter throughout the season. Sometimes your human reach just isn’t enough to get to the top of a glorious tree, and fully extending yourself from the top of a wobbly ladder is not the safest option (read more about ladder safety here). So, if you can plant your feet safely on the ground and extend your reach – you should! This makes canopy wrapping tree branches a breeze because you don’t need to keep moving a ladder around.
An extension pole is perfect for assisting with removals as well. Got a difficult roofline to deal with? A high peak? Or maybe some ice and snow is getting in your way? What if you could take the lights and clips down with a bionic arm? This tool IS essentially a bionic arm that cuts your removal time in half and keeps ladders out of the picture.
Sometimes the removal process requires two people, each with one extension pole. One person’s job is to lift the clips and light sockets off the roofline, while the other person’s job is to support the line of lights so that the weight doesn’t tear the whole thing down in an uncontrolled manner.
What you'll need:
- An 8-16 foot extension pole - These can be found at a variety of locations such as your local paint or hardware store. *We like the click-lock extension poles as we find that they last longer and are more durable than the twist-lock extension poles which can lock up if dirt gets inside*
- A standard coat hook - These can also be found at your local hardware store. Don’t get the small ones. Get the standard size or even bigger if you want to. The stronger the better. Normally, the hook is accompanied with the appropriate screws. If not, you will need to pick some up.
- Tools to complete the task - A drill as well as the appropriate bit for the screws.
Instructions:
Step 1 - First, pre-drill holes in the end of the extendable part of the extension pole. Make sure they line up with the existing holes on the hook you are attaching. To do this, hold the hook against the pole (where you would like to attach it). Using the hook as a stencil, take a marker and mark down the placement of the screw holes.

Step 2 - Remove the hook and drill holes smaller than the diameter of the screws, so that the screws will be snug and your hook won’t be wobbly.
Step 3 - After the holes are drilled, hold the hook on the pole, screw in the screws, and VOILA – you now have yourself a bionic arm, ready to conquer the world of hanging Christmas lights!